If you are fishing long days with your electric trolling motor, you will probably want a lot of battery power. That power can be achieved in many ways, but if you add batteries to your current system, you will want to add a separate battery bank.
The best way to manage that battery bank is a Dual bank battery switch. This article will answer all your questions about Dual bank battery switches for your electric trolling motor.
Note: most links in this article are Amazon.com Affiliate links, see Affiliate Disclosure, thank you.
What is a Dual Bank Battery Switch for Your Trolling Motor?
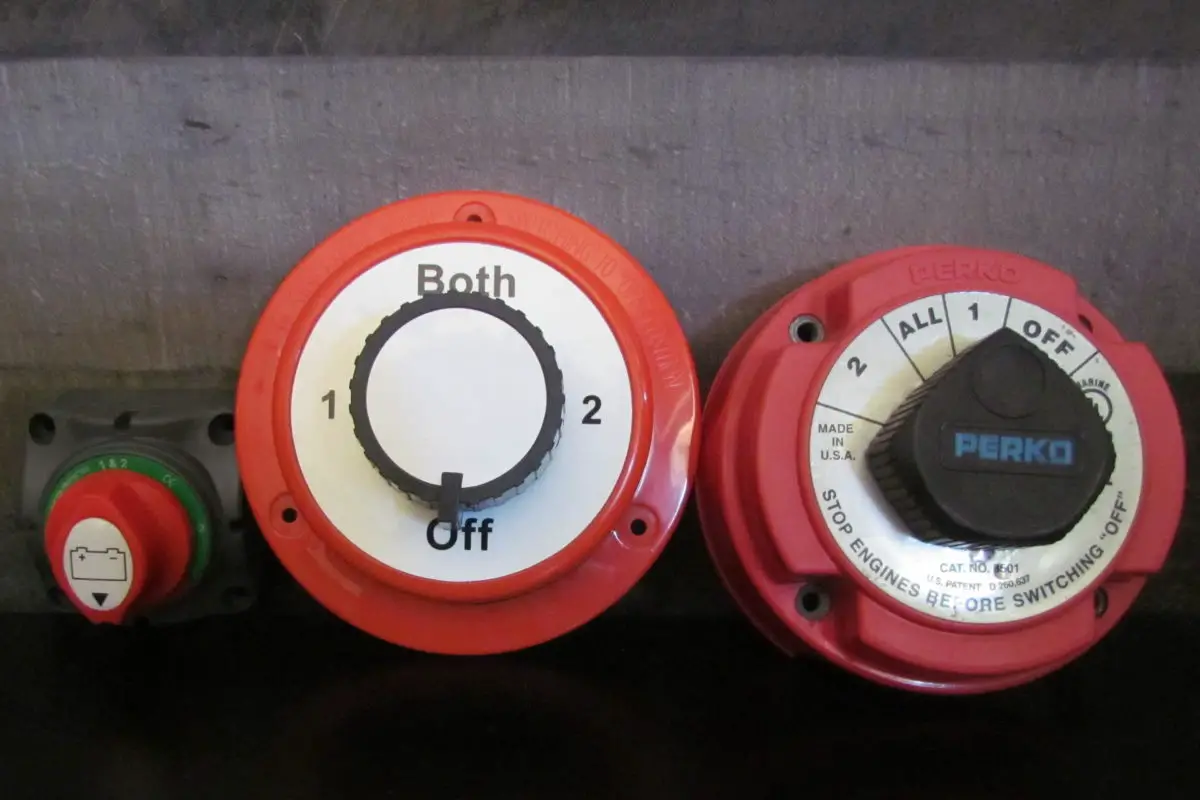
A dual bank battery switch is a switch that allows you the ability to manage 2 battery bank connections with a single switch. Because the switch controls 2 battery banks, it is common for a dual bank battery switch to have multiple settings.
A single bank battery switch is a basic on/off switch, AKA an open or closed switch. A dual bank battery switch typically has 3 or 4 positions, including off, bank 1, bank2, and combine bank 1 + 2.
The different settings of a dual bank battery switch allow you to manage your battery bank connection to achieve different results manually.
Why is a Dual Bank Battery Switch Import for Your Trolling Motor?
A battery switch is a vital tool to protect your batteries by disconnecting them from the load (trolling motor). A dual bank battery switch adds an extra level of protection by disconnecting one or both battery banks from the load or combining the batteries if they are compatible.
When charging your trolling motor batteries, most manufacturers recommend that you disconnect your trolling motor. Unplugging is one way to disconnect your trolling motor, and another way is to use a battery switch to disconnect the power source.
The thought behind disconnecting your batteries is to protect your electronics from power surges and irregular voltage spikes during battery charging. Many people have had their trolling motor control board go out after a charging cycle.
Some batteries are incompatible, like lithium and AGM, so you do not want to combine them. These two battery types have different voltages and different charge profiles. A dual bank battery switch will allow you to have different battery types in one system without combining these batteries.
Additionally, if your battery banks are not identical in size (amp hours), age, and even brand, you should avoid combining them. The weaker batteries will draw power from the stronger batteries and cause them to degrade faster.
The 2 bank battery switch will allow you to run your trolling motor on one bank then switch banks when you reach the 50% depth of discharge. Some people will set up a large primary battery bank, and with a smaller secondary battery bank, you will be able to fish back to the dock or extend your fishing day.
Keeping a reserve bank is another essential function of a dual bank battery switch. Disconnecting one battery while fishing is a great way to prevent your electronics from discharging your main motor starting battery.
Check out our article that explains battery switches used in a starting battery application in more detail.
How to Install a Dual Bank Battery Switch for Your Trolling Motor System?
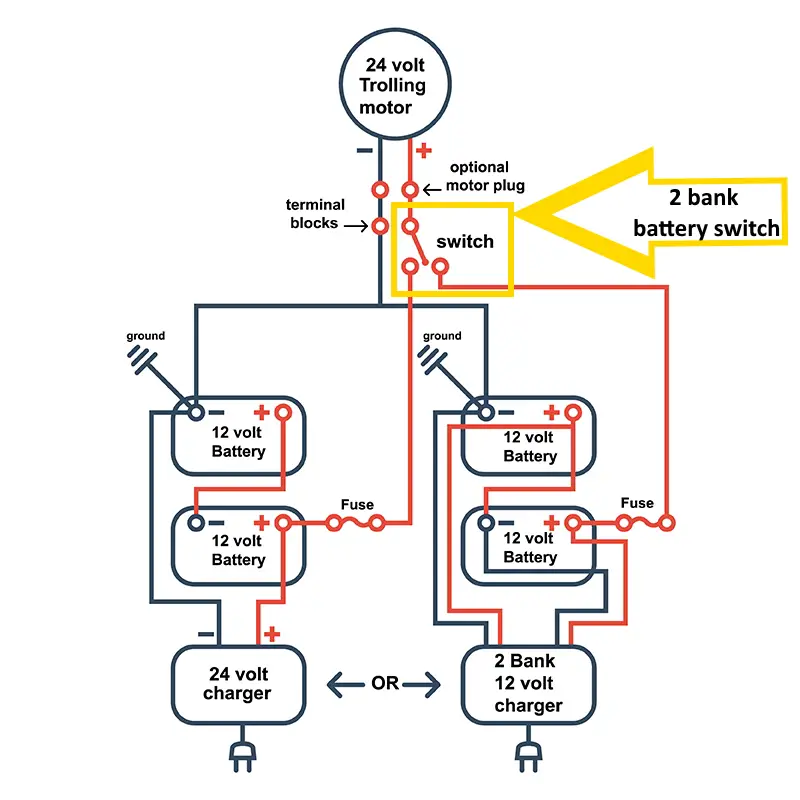
Installing a dual bank battery switch is a project that just about anyone can handle, and if you install your trolling motor, this will be a breeze. Some manufacturers include instructions, but if your dual bank battery switch manufacturer doesn’t include instructions, we have some basic steps to help you along the way. Also, we made a video on our last dual bank battery switch install that you can view on YouTube.
- Find a suitable location for your battery banks where they can be secured, protected from the elements, and conveniently close to your trolling motor. We know that most boats leave you very few options where you put your batteries, but when you have the opportunity, the closer the batteries are to the trolling motor, the better because of wire length.
2. Run your wire from your trolling motor to your first battery bank as if you were doing a single battery bank install. Make sure your run an extra twelve inches of wire for cutting in the switch.
3. Locate a convenient location along the path of the wires for the switch, accounting for access and the additional wire from your secondary battery bank. Test fit the switch or complete a dry install so you can measure and attach wiring in a later step.
4. Run a wire from your secondary battery bank to your switch, leaving six inches to complete the connection.
5. Connect all the positive wires to the switch as marked in the switch directions. Most switches are marked as “Common, Load, or Feeder” to the trolling motor, “1” to the primary battery bank, and “2” to the secondary battery bank.
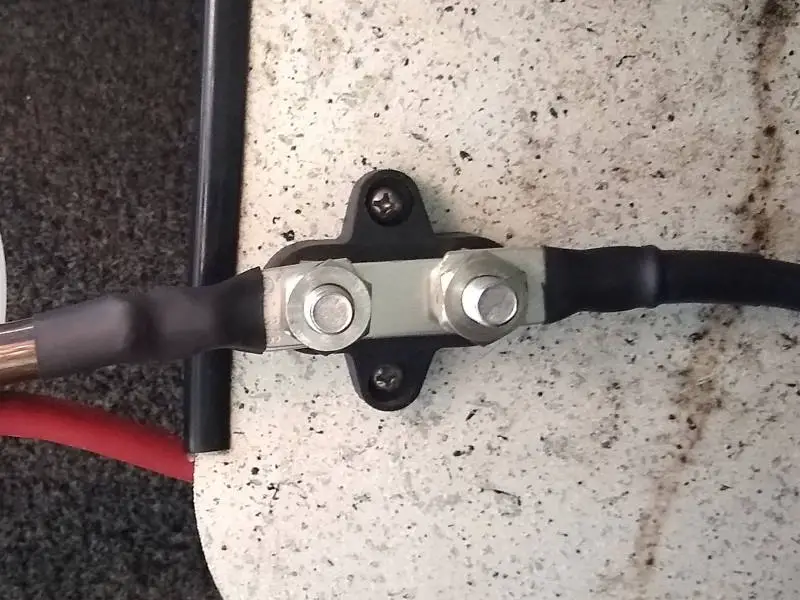
6. Connect all negative wires in a location close to the switch for organization and convenience. We like two stud terminal blocks, but, in most cases, a single stud terminal block will work or even a bolt connection but secure it well.
7. Connect positive wires to your battery banks, including the proper size fuse or breaker, in most cases a 60 amp.
At this point, your system should be operational, but you will need to connect your charging system. You should run your charging system independent of your dual bank battery switch, which should not be an issue as most chargers have built-in battery isolation systems.
If you feel uncomfortable with this installation, hire a professional or consult with a trolling motor installation certified marina.
Notes:
Don’t forget a fuse or breaker is needed for each battery bank.
Wire gauge should be uniform for your entire battery system based on the longest length of wire run from your battery bank to your trolling motor.
Jumper wires between the batteries should be a larger gauge than your wire run to promote a balanced load on the batteries in the bank.
Safety Tips for Dual Bank Battery Switch for Your Trolling Motor System?
A few best practices and safety tips never hurt. Let’s start with always having all connected devices off before you change your dual bank battery switch. Power surges can damage different components of your boat’s system.
Combining batteries of different types or ages is terrible for your batteries and can also be dangerous. The weaker batteries tend to draw power from the stronger battery and can boil dry if not closely watched.
Also, don’t combine batteries of different voltages; this can be extremely dangerous.
Tips for Buying the Correct Dual Bank Battery Switch for Your Trolling Motor System?
Picking out the correct dual bank battery switch for your trolling motor can be a bit confusing. We have a few tips for you that will help you narrow it down to a few suitable options.
- Marine-rated battery switches are a great place to start. However, any water-resistant switch should work just fine. An IP rating is an excellent way to know if your plug has the proper protection. We recommend an IP67 or better for use in any boat, and you can look up a chart of what this rating means on Wikipedia.
2. Amp Rating Capacity is vital to prevent issues, including fire. Find your trolling motors max amp draw, add 20 percent, which will give you the minimum rating (max amp x 1.20 = minimum rating). Most trolling motors max out at around 55 amps, and most low-end dual bank battery switches will carry 100 amps continuously, while it is common for 300 amp surge capacity.
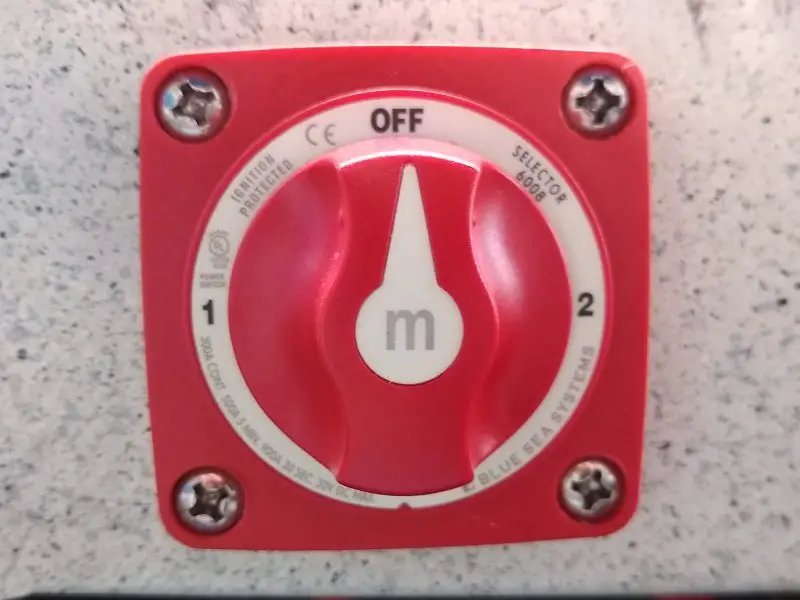
3. Switch Settings might be vital to you if you run different battery types on your boat, like lithium and AGM. Because you will never want to combine these different battery types purchasing a battery switch without a “1+2” setting might be a priority. You can see the different setting options in this Amazon.com listing for the Blue Sea Systems 300 Amp m-Series Battery Switches.
4. Mounting Type might make a difference in which switch you choose. Some switches are best for surface mounting, and others are best for counsel or dashboard mounting. Try to find a switch that meets your system requirements while also allowing for mounting type and good wire management.
Our Top Picks for Dual Bank Battery Switches
For starting battery and accessory battery of the same chemistry –
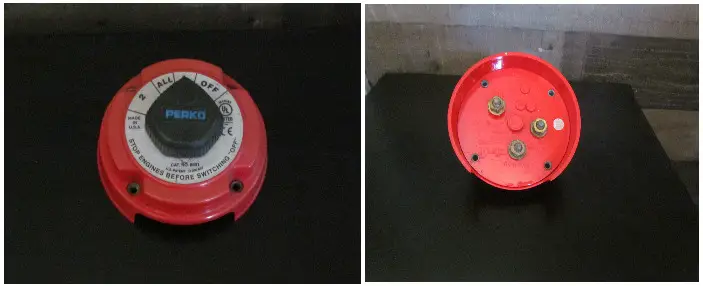
Perko 8501DP Medium Duty Battery Selector Switch Red, Small
For trolling motors with the same or different chemistry battery banks –
Blue Sea Systems 300 Amp m-Series Battery Switches
Product Overviews
Testing notes: we tested all of these switches at 12, 24, and 36 volts, even if the switch wasn’t rated for 36 volts. Our primary test was to run a 24-volt trolling motor at 50 amps for one hour. Our second test was to start the main engine (Mercury 115 Optimax Pro) on a 12-volt battery, 1000 watt inverter, and a 12-volt spotlight.
Blue Sea Systems 300 Amp m-Series Battery Switches

Blue Sea Systems makes some of the most trusted and dependable marine electronic equipment on the market. The Blue Sea System 300 Amp m-Series battery switches have a continuous rating of 300 amps with a maximum voltage of 32-volts of DC power. These switches are also IP66 waterproof and ISO 8846 rated for ignition protection.
Pros:
- Built to be long-lasting and durable.
- IP66 waterproof rating.
- ISO 8846 rating and meets all ABYC requirements for ignition protection.
- Can be safely installed and used on gasoline-powered boats.
Cons:
- Studs may be too small to handle 300 amps.
A few users commented that the studs were overheating and caused cables to become damaged when loaded with the maximum amperage. In our testing, we never reached 300 amps continuous draw.
The primary load tested on this switch was 50 amps continuous, and no heating or reducing of switch performance was noted. Additionally, 300 amps is not a load that we would recommend for any small boat electrical system components.
Check out the price on Amazon.com
Perko 8501DP Medium Duty Battery Selector Switch Red, Small

Perko is another trusted and well-known brand in the marine electronics market. The Perko 8501DP Medium-Duty switch is built with quality materials and has a capacity of 250 amps of continuous use, and 360 amps of intermittent use. This switch works with 12, 24, and 34-volt marine electrical systems.
Pros:
- Versatile switch that can be used for 12, 24, or 36-volt marine electrical systems.
- Ignition protected to be used aboard gasoline-powered vessels.
- 250-amp capacity for continuous use, 360 amps for intermittent.
- Optional locking model available.
Cons:
- The switch’s standard mounting leaves terminal connections and wires exposed to the elements unless you purchase additional parts.
This Perko 8501DP Medium Duty battery selector switch has been in production for many years, making it one of the most reviewed switches on the market. Some reports of defective products being sent out and of corroded positions and shorts due to weather exposure seem to be an issue.
We have had this exact model switch in service for years without any issue. The switch was exposed to extreme weather and saltwater during its service life and is now being used on a small solar panel system. This switch was retired because the battery combiner setting is not compatible with battery banks of different chemistry, and we wanted a more compact design.
Check out the price on Amazon.com
Attwood 14230-3 Single Pole 4-Way Selector Marine Battery Switch

This Attwood 14230 4-way selector marine battery switch is rated for 300 amps continuous use at 6-volts and 150 amps of continuous use at 12-volts. However, this switch can be used for any system from 6-volts to 32-volts of DC power. This Attwood 4-way selector marine battery switch includes an automatic alternator field circuit disconnect to prevent power surges and protect all of your boat’s electronics.
Pros:
- Built rugged and tough to be long-lasting. Made with copper washers and solid brass terminals and nuts.
- Versatile: Can be used for any battery set up from 6-volts to 32-volts.
- Attwood products are compatible with most marine products.
Cons:
- Smaller components of the switch can become loose.
For the most part, the Attwood 14230 4-way selector marine battery switch is a solid choice for any boat owner. The only complaints seem to revolve around small parts becoming loose and easily lost.
There have been reports the switch melted once it was hooked up to battery power in a few circumstances. We had no issue with overheating during our testing.
Additionally, we did not test the automatic alternator field circuit disconnect, so we can’t comment on this feature.
Check out the price on Amazon.com
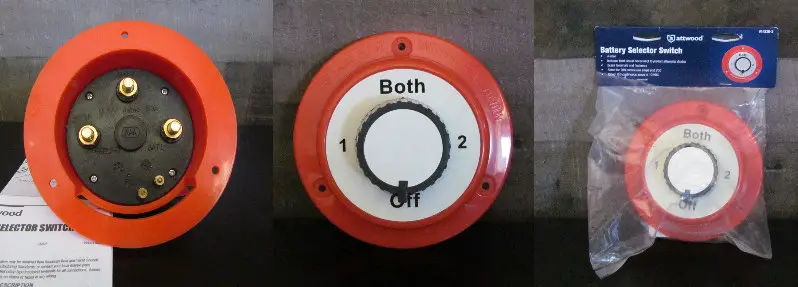
Ampper 1-2-Both-Off Battery Disconnect Switch, 12-48 Volt

This Ampper brand switch is easy to install and easy to use. It has the simple options of using battery 1, battery 2, both batteries, and all electricity off. The ABS plastic housing is durable and made for safe use. Also, this Ampper switch is compatible with any marine electrical system up to 48-volts.
Pros:
- Budget friendly
- Durable and well-constructed.
- Compatible with any marine electrical system up to 48-volts.
- This switch can also be used for RVs, cars, trucks, and other non-marine purposes.
Cons:
- 200 amp continuous rating
- Comes with very few installation instructions.
This Ampper switch is very well reviewed by numerous people who say it is well-constructed and works perfectly fine. The main complaint has been that the installation instructions can be a bit unclear or confusing for someone who may not have much experience wiring marine electrical systems.
The 200 amp rating might be a limiting factor for some people. Our tests focused on trolling motor and starting engine amperages, and this switch performed well. The compact size of the Ampper Switch makes it an excellent option for wire projects with limited space; however, without a waterproof rating, you might want to keep that in mind when mounting.
Check out the price on Amazon.com

Conclusion
We hope this article has pointed you down the right path to picking and installing the perfect dual bank battery switch for your boat’s trolling motor system. Also, remember that a trolling motor switch is not very expensive, so if you are not happy with the options, you can always upgrade later.

