When O.G. Schmidt first invented the electric trolling motor in 1934, only a few people anticipated the widespread use of the machine today. He did a great job of creating a system that allows fishing boats to move through the water quietly without spooking fish.
As of now, there are many brands of electric trolling motors. Surprisingly, deciding on a brand to purchase becomes a daunting task. Interestingly, manufacturers of electric trolling motors aren’t resting on their laurels. The improvement of this system remains an utmost priority.
Quite often, you’ll find electric trolling motors categorized based on the steering mode. Other times, it isn’t strange if you find them categorized based on mounting options, but most of the time, you’ll find them categorized based on the voltage rating of the system.
While you’ll see many people argue over the best choice of trolling motors, everyone loves the idea of saving the extra cash that would have been spent on technicians performing simple enough task. Therefore, sit back and relax as this guide will take you through all you need to know about electric trolling motors, most notably the 24 volts type. But first, I need to ascertain that you have at least a basic understanding of the system and how it works.
Note: most links in this article are Amazon.com Affiliate links, see Affiliate Disclosure, thank you.
Fundamental Parts of an Electric Trolling Motor
Although manufacturers have design considerations that make their products uniquely different from their competitors, all of their products still share some similarities. These similarities are seen as the fundamental parts of the electric trolling motor, and they include;
- The Motor
- The Propeller
- Shaft
- Controls
The motor is the most crucial part of the device. Unlike every other motor, you’ll find it submerged in water. However, you can be assured that it still converts electrical energy to mechanical energy. This mechanical energy is in the form of rotation, and it is associated with driving the boat.
The propeller can be identified with its blades. You may have seen it attached to a motor, and perhaps called it a fan. Not to worry, you’re not far from being correct because a fan shares similar features with a propeller
There is more to propellers than what end-users acknowledge, but that will be a topic for another day. What you should know, however, is that a propeller is a device with a rotating hub and blades set at a pitch.
By carefully studying the configuration, you’ll notice how the hub and blades form a helical spiral. The combined operational effect of these components is to transform the rotational power from the motor into a linear thrust.
The shaft is a long stem that houses the controls. With a standard length of 42 inches, it’s hard to miss on sight. There is a compromise between the length of the shaft and the performance of the motor.
While most end-users try to strike a harmony between long and short shafts, something all fishermen try to avoid is a short shaft. You don’t want to make a commotion that will drive off fish.
Much emphasis was laid on the propeller and the shaft. You’d likely assume the most critical component of the trolling motor has been discussed. Don’t get it twisted; no one can overstate the importance of the propeller and motor in this system. However, of what importance are these components without a means of regulation and control?
The controls of the electric trolling motor are systems put in place to help in maneuvering your boats. The trolling motor could be hand-controlled or foot-controlled. The advent of technology has also included remote-controlled trolling motors to the market.
The functionality of these parts wouldn’t be possible without a power source. The deep-cycle batteries are used in powering the trolling motors and other electrical components. Don’t be intimidated by the terms; these batteries are called so because accessories utilize them for extended periods.
The 12 volts, 24 volts, and the 36 volts battery system are used in powering trolling motors. Although this guide is focused on the 24 volts trolling system, all the battery systems have their advantages and disadvantages. However, until you’re able to mount the trolling motor by yourself, you need not worry about the battery and electrical connections yet.
Click here for our detailed article What are the basic parts of a bow mount trolling motor?
Mounting the Trolling Motor
Many anglers are scared to work on their boats. This is understandable as it hurts when you worsen the condition of your machines as a result of a lack of experience. However, working on boats isn’t complicated. It’s even easier when all you’ve got to do is install. With a few bolts, wires, and other minor tools, you can do most things on a boat.
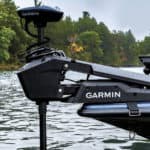
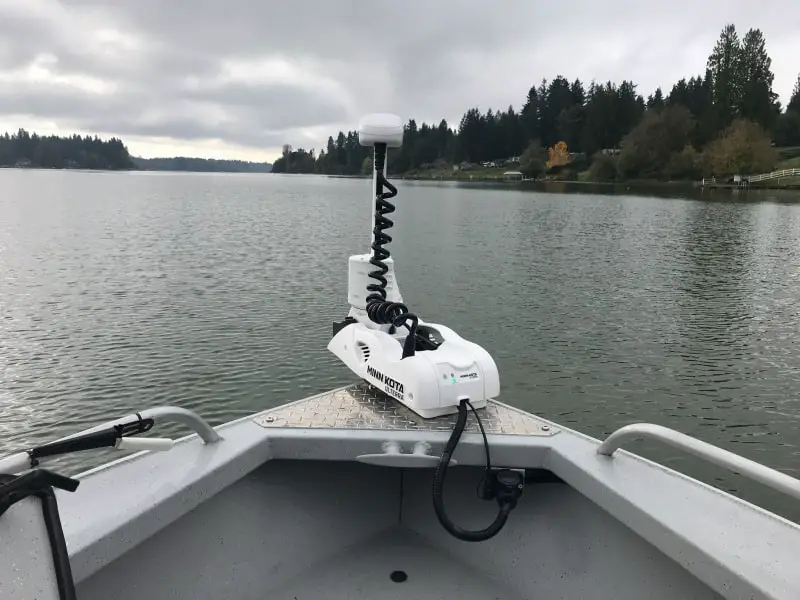
Often, you’ll find the trolling motors mounted on the bow or stern of boats. On rare occasions, you’ll see the trolling motor mounted on both the bow and stern of boats. There’s no fixed rule for the positioning of this motor. It all depends on your particular application.
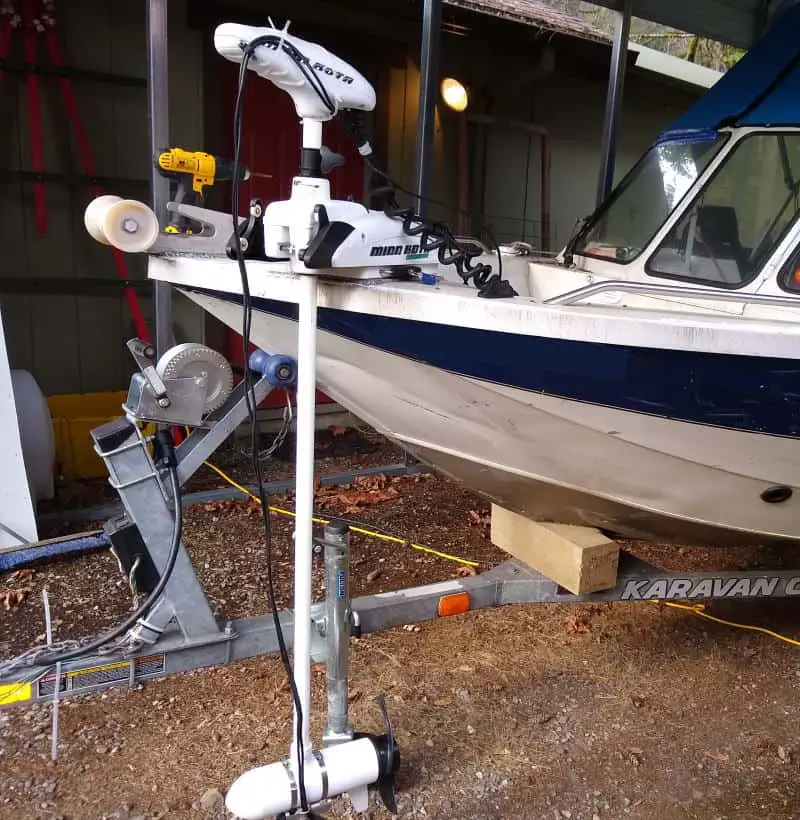
Transom Mount Trolling Motor
Transom Mount Motors are installed right on the stern. The electric trolling motor comes with mounting clamps. For most of the motors you’ll see, there are usually two clamps. Some manufacturers have put in place only one clamp. That shouldn’t cause a problem as long as the clamp holds the trolling motor firmly on the boat’s transom.
1. To commence the installation procedure, open the mounting clamps by turning the screw. Turn the screw(s) counterclockwise. When the opening is wide enough to straddle the transom, slip the clamp(s) over the transom.
Here’s one thing to note; The primary motor is always positioned at the center of the stern if there’s one. You don’t want to interfere with the operation of the primary motor. Therefore, it’s best to have your trolling motor not too close to the motor. Sadly, things don’t get better when the trolling motor is located too far from the center of the stern. You don’t want to lose the precision maneuverability.
2. Next, tighten the clamps by turning the screws clockwise. Ensure that the trolling motor is fully secure. In doing so, you eliminate the chances of the motor vibrating during operation. Also, avoid overtightening the screws, so you don’t create dents on the transom.
3. Adjust the propeller depth to suit your preferences. There’s no specific rule stating the most suitable depth of propellers underwater. However, most anglers agree that having the propeller at least 10 inches underwater allows for the smooth operation of the trolling motor.
To adjust, you’ll have to loosen an adjustment collar by turning counterclockwise. This collar can be found on the transom motor’s main shaft
Bow-Mounted Trolling Motor
Before attempting to mount the trolling motor on the bow of your boat, you need to ensure that you have a flat section on the boat’s forward deck. This deck must be accessible both above and below, and you’ll understand why in a bit. Additionally, we recommend that you have an assistant to help you as there will be points when you will need an extra set of hands.
1. Firstly, you’ll have to choose a mounting spot on the deck. The chosen spot can be directly in front of the bow or slightly to either side, an easy decision based on your preference. You might have to read the product guide to make a decision.
However, the chosen spot must be one that allows you to lower and raise the motor assembly easily and clear all obstructions while deploying and stowing. In doing so, it becomes an easy task to store the motor on deck.
2. The bow-mounted trolling motors come with a mounting base. This mounting base attaches to your chosen spot on deck. Most manufacturers create six holes to accommodate bolts.
Here comes the easy task. Place the mounting base on your chosen spot on deck. With a pencil, mark the positions of the holes on the deck. Remove the mounting base from the deck when you’re done. Performing this step is one of many where an assistant to hold the motor makes all the difference.
3. Drill through the marked holes using a power drill. While a few have suggested using a drill bit slightly larger in diameter than the trolling motor’s bolts, here’s when the product guide becomes very handy. Check the product guide to determine the suitable drill bit size for the operation.
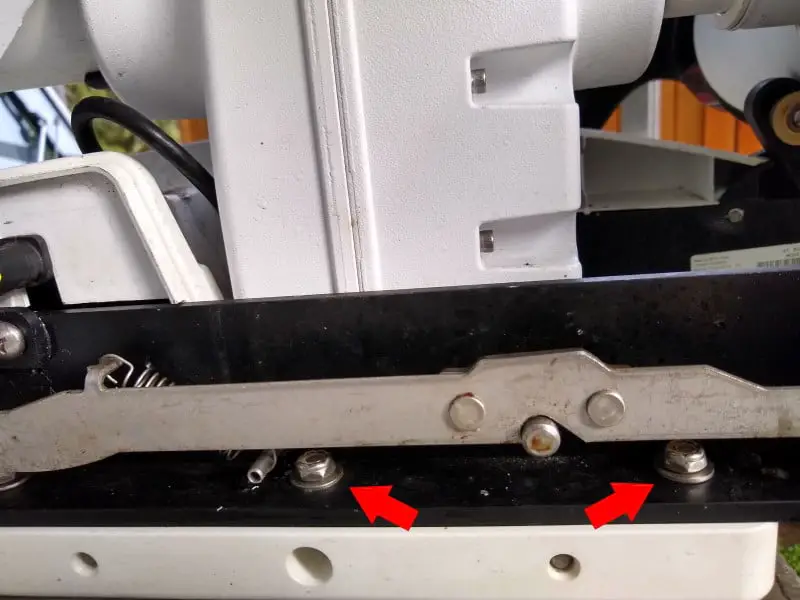
4. Insert the bolts in the holes of the mounting base. Slip a washer over the thread of each bolt. Not to worry, the washer is a metal ring that comes with the trolling motor. It helps in preventing the spread of vibration from the motor to the boat, and it’s something you shouldn’t forget to include during installation.
5. Place the mounting base on the deck so that the bolts enter the holes you already drilled. Ensure that the mounting base isn’t shaky. You might have to add more washers if it is. Some trolling motors include spacers or rubber washers to go between the motor base and the boat providing balance and helping eliminate any vibration.
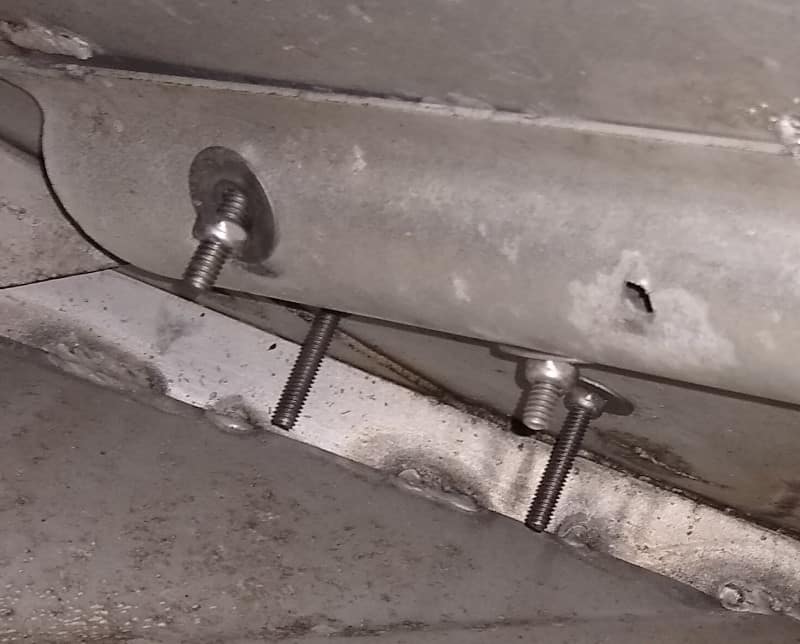
6. Once you’ve ascertained that the base rests evenly on the deck, you’ll have to thread another set of washers and new sets of nuts from below the deck surface. Interestingly, most manufacturers of trolling specify stainless steel washers to be used below the deck. Check the product guide to confirm.
Fit the nut on the bolt with your hand by turning it clockwise, and use a ratchet to finish tightening the nut. Ensure you don’t try to force the nut tighter, for you don’t want to damage the deck surface or the bolt. If you damage the bolt you should look for a replacement that is grade 8, marine rated.
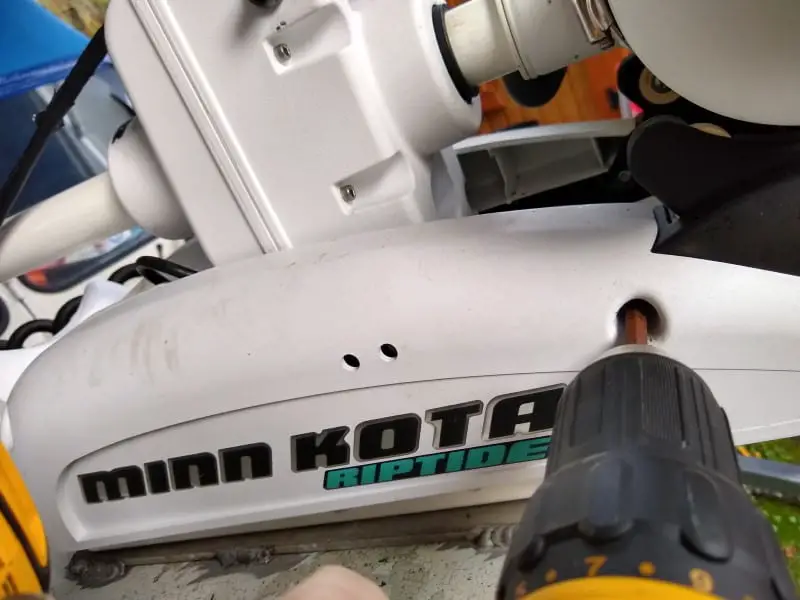
7. Finally, assemble the trolling motor mounting base. This should be very easy, but don’t ignore any of the instructions provided in the product’s guide. Normally this step involves installing or reattaching the mounting base covers.
Note: some people choose to install a quick disconnect bracket, in which case you would install the bottom of the bracket to your boat and the top to your motor. Most brackets have a smaller base and a larger top to match your model of trolling motor.
Click here for our detailed article Tips on Installing an Electric Trolling Motor?
Electrical Connections
“You don’t want to make a mistake” are the watchwords of fishermen when trying to set up electrical connections for their trolling motors. Although making a mistake can melt the internal and external battery parts, you should count yourself lucky if that’s all you’ll have to deal with.
By keeping it simple, you’ll seldom make a mistake when dealing with electrical connections for your trolling motor. After installing your trolling motor and placing your batteries into it, the critical part begins.
Safety Note: we cannot stress enough the importance of installing a fuse or breaker to US Coast Guard Code, manual reset, proper rating, no more than 7 inches from the battery terminal.
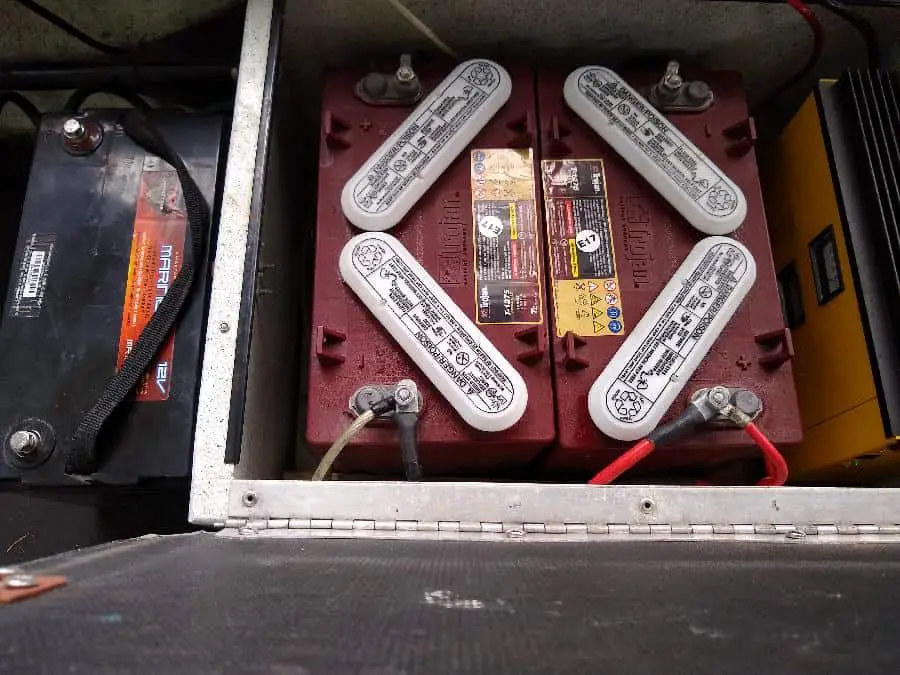
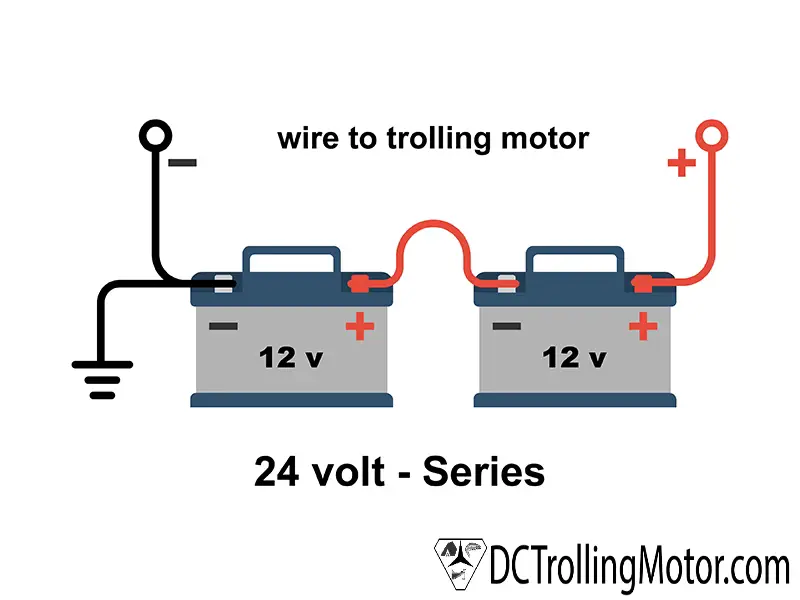
Step One: setting up your 24 Volt Battery bank
Obtaining a 24 Volts battery system is quite easy. You might decide to purchase a single 24 volts battery, but it is more common to connect two 12 volts batteries in series. If you’re trying to make a series connection using two 12 volts batteries, you’ll need a jumper wire.
Firstly, Line up the batteries side by side with the positive terminal of one adjacent to the negative terminal of the other. Using a suitable length and gauge of jumper wire, connect the positive terminal of one of the batteries to the negative terminal of the second battery.
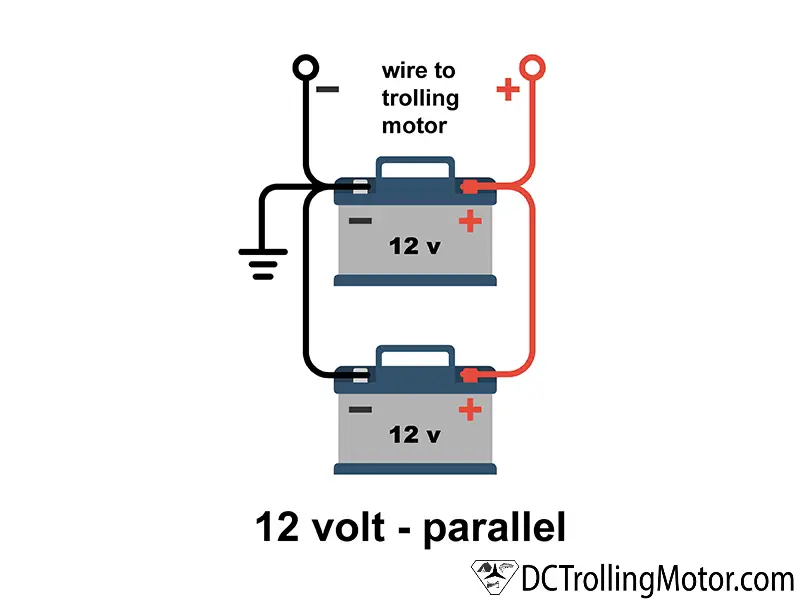
Sometimes, anglers choose to connect two 12 volts batteries in parallel. Here, the positive terminals of the batteries are connected with a jumper wire. The process is also repeated for the negative terminals of the batteries.
While this type of connection increases the overall current capacity and overall amp-hour rating, you should know that the equivalent voltage rating of two 12 volts batteries connected in parallel remains the same. For example, if you connect two 12 volt 100 amp hour batteries your end result will be 200 amp hours at 12 volts.
This configuration will not work for a 24 volt trolling motor but can be a benefit for a 12 volt system. Two batteries connected in parallel double the amp hours and two batteries connected in series double the voltage, all other specifications remain constant.
Click here for our detailed article How to Wire a Battery for a Trolling Motor?
Step Two: Connect the trolling motor Leads to the batteries
Next, connect the positive lead of your trolling motor to the positive terminal of your battery. Repeat the process with the negative lead of your trolling motor and the negative terminal of your battery. It is not unusual for a small spark when making the last connection to your battery so take precautions around fuel.
Tip: If it’s an old motor or replacement motor, it’s not strange to find corrosion on the wiring. Grab some baking soda and mix it up with a little water in a Ziplock bag to form a thin paste. Place your wire ends in the bag and work the paste into the corroded areas. Leave for about five minutes, after which you wash up dry. You’ll be amazed as to how this procedure equalizes the acid in the corrosion, giving you improved performance and appearance.
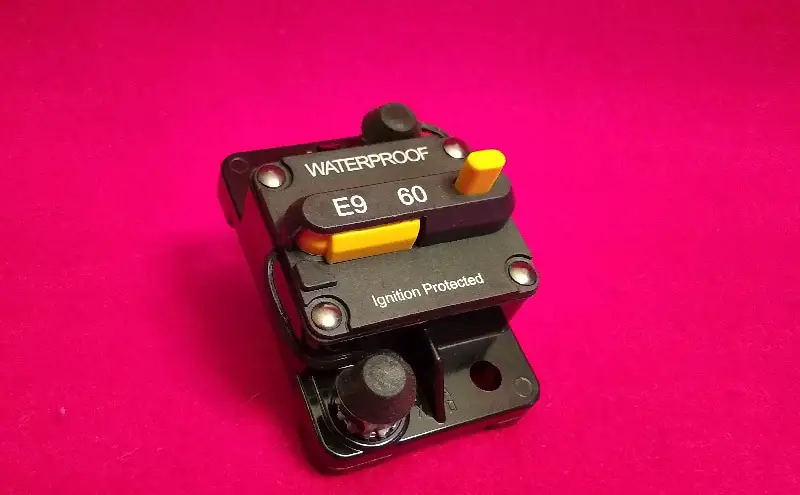
Step Three: Ensure that the Circuit Breaker is connected.
The circuit breaker is connected to the battery, and it is an automatically operated electrical switch. It helps in protecting your electric trolling motor from damage caused by excessive current or a short circuit that could cause a fire. Most manufacturers provide circuit breakers of 50- or 60-amps rating. For instance, Minn Kota’s circuit breaker is of the 60-amp rating.
Now that you’ve understood the installation procedures, here comes another important aspect of the electric trolling motor, which has been the cause of many arguments between experts and beginners. It gives you the chance to choose between cost and performance.
Advantages of the 24 Volts Trolling Motor System
With this influx of information, I’m quite sure there are lots of questions running through your mind. “Do I go for 24 volts trolling motor system, or should I stick to my 12 volts system? What’s the best way of connecting two 12 volts batteries, in series or parallel? How do I wire two 12 volts batteries to get 24 volts battery system? Is there a 24 volts battery?”
Before answering any of these questions, let me show you why I think the 24 volts electric trolling motor is right for you.
An experienced angler or technician won’t hesitate to point out to you how power is the biggest advantage of having 24 volts trolling motor system. As a fisherman, have you had high confidence in a spot on the lake, but you’re hindered by the wind blowing hard? A few people argue that the 12 volts system is also great when fighting the wind, I’m guessing they don’t fish for an extended period.
If you plan on sitting out there and fishing for at least eight hours, without having to worry about running out of power, then the 24 volts trolling motor is something you shouldn’t give a second thought. Besides, you have access to more thrust.
24 volt systems have the widest amount of products available to purchase. Manufacturers and professional anglers have considered the 24 volt systems to be the best standard for years, so the marketplace is full of quality products for all your needs.
Asides from the fact that the 24 volts battery system gives you more thrust, it also permits you to use smaller gauge wires without having to worry about the amount of power they can deliver. Although the 36 volts battery offers you more in terms of thrust, the extra weight it adds to your boat is not worth the gain in thrust. Finally, the increased cost of a 36 volt system including your motor, charger, and battery doesn’t balance out.
Disadvantages of the 24 Volts Trolling Motor System
While a few fishermen believe the 24 volts trolling system is pricey, others have stated that there’s more to it than cost. For instance, the extra weight it adds to the system has been the subject of debate for a while. Regardless, they all agree that a single 24 volts battery offers more in terms of boat light-weighting as compared to two 12 volts batteries connected in series, but then you need a 24 volt charger.
Charging Your 24 Volt Trolling Motor System Batteries
Every angler has a fear of being stranded out on the water. Quite often, the cause might be technical, but most of the time, it’s because of a drained battery. Regardless, you’ll have to get on the radio to get rescued. Sadly, you could have saved yourself from embarrassment if you charged your batteries the right way.
There has been advancement in technology throughout the years. In the past, batteries were recharged by moving battery acid within the battery containers. Asides from the fact that this procedure took a long period to be completed, it needs much physical effort. You should be grateful you don’t have to experience it.
Charging your batteries is as easy as connecting the positive and negative leads of the charger to the positive and negative terminals of your battery. As of now, you could recharge a battery using solar panels, a portable battery charger, or an onboard charger.
Click here for our detailed article How do I charge 24 volt trolling motor batteries?
Charging Batteries using Solar Power
Some manufacturers of trolling motors incorporate a means for charging with solar panels and other equipment.
While this is not reliable, it’s quite cheap and durable. You simply have to position the solar panel on the boat. I would advise you to position it in a high enough location to allow you to catch much direct sunlight as possible. Usually, a boost converter can come in handy. It helps in converting low voltage to high voltage.
It comes with a drawback of weather conditions. It might be impossible to charge the motor late in the afternoon. Also, you have to be patient to use a solar panel.
Charging using a Portable Charger
Every angler agrees that the importance of a portable charger for trolling motors cannot be overemphasized, especially for deep cycle batteries. They are durable, and they charge your batteries faster than solar panels.
Besides, they’re not as bulky as the solar panels and can be considered negligible when compared with the weight of the boat and batteries.
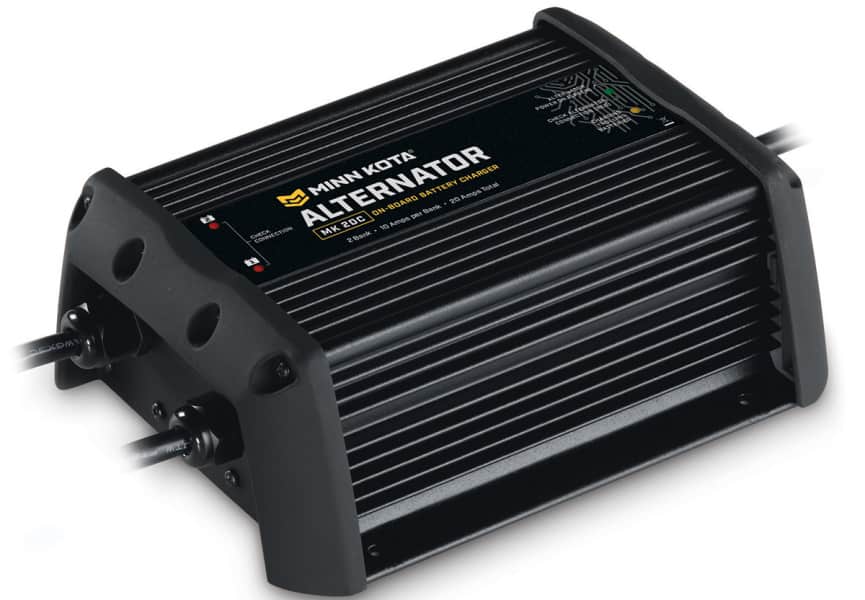
Charging Batteries Using an On-Board Charger
The on-board battery charger comes in many varieties, some of which are; precision, Digital, and DC alternator. Regardless of your choice, each is quite durable and charges your battery pretty fast. Interestingly, the precision models work with all types of batteries, so you need not worry about the brand.
Whatever battery or charger you decide to use on your trolling motors, you have to abide by these rules;
- Try as much as possible not to overcharge your battery
- Keep the terminals clean, especially if you’re fishing in saltwater. A damaged terminal renders your battery useless.
- Ensure that the battery leads are functional. Bad test leads on a battery can cause wrong readings when tested with a multimeter. It also harms the functionality of the electrical system. This is because the leads are contributing to additional electrical resistance.
- A multimeter may become handy to test the capacity of your battery. By connecting the probes of the multimeter to the terminals of the batteries, you can measure the voltage rating.
Click here for our Review of the top 3 bank marine battery charger
Selecting a Wire Size for 24 Volts System
While most manufacturers recommend 8-gauge wires for most 24 volts system, you might have to consider the length of wire for the system. Usually, a 6-gauge wire is always recommended for a system of 20 feet or longer. Regardless, it’s crucial to know how many amps your battery draws.
You may have seen a small document printed on your battery, but have you taken the time to glance through them? Also, have you read through the user manual that came with the trolling motors? Most manufacturers indicate the requirements in these documents. Lucky for you, they are easy to understand.
Click here for our detailed article Best gauge wire for a 24 volt trolling motor?
Top Brands in the Market
Below are some of the top brands to look out for when considering purchasing a 24 volts electric trolling motor:
Cloud Mountain Saltwater Transom Mounted Motor

Cloud Mountain launched into the trolling motor production for fishing boats about a decade ago, although they started initially as an outdoor furniture company. Ever since then, I can say they have enjoyed stupendous success in this line of business, suggesting that their decision to expand was a wise one.
This company produces motors with thrust levels ranging between 36 to 86lbs, giving you a choice to decide the thrust level that’s perfect for your boat. The unique feature of this brand is that it allows you to sail in both fresh and seawater.
With its eight-speed gear, which consists of five forward and three reverse speeds, you can reach a top speed of 4 mph when on a 100% forward cruise.
I must confess that this motor offers one of the best battery efficiencies as it can cruise on for several hours. Also, it has an indicator to show you how much charge is remaining. With this fantastic feature, you are sure never to be caught off-guard on the battery level.
This motor is the best fit for small boats or Kayaks because of its 28-inch composite shaft, which happens to be shorter than usual. If you own a boat larger than kayaks, then you have to consider another brand.
Click here to see the price on Amazon.com.
Minn Kota Maxxum Bow Mount Trolling Motor

This piece is a must-have if you love the high performance. It is unbeatable among its peers in the Minn Kota family. The power it produces is just incredible! You also have the choice to choose from 55 to 86lbs thrust level based on your need.
With its weedless wedge 2 feature, you need not worry about weed as you maneuver with your boat. Also, you don’t have to worry about getting stranded when you set out for a trip. This is because the manufacturers have equipped it with a directional and battery indicator, leaving you well-informed of your power and location at all times.
A digital maximizer is also put in place to ensure a small fraction of the battery drain after many hours of trolling.
While this motor allows you to choose from different sizes of shafts, it’s unfortunate that its hardware isn’t made to be saltwater compatible. Hopefully, this feature would be added soon. Regardless, if you own one of those large boats, then the 52-inch shaft is perfect for you, while the 42-inch is ideal for medium-sized boats.
Click here to see the price on Amazon.com.
Minn Kota Edge Bow Mount Foot Control Motor

This right here is another rare gem from Minn Kota. This was designed to impress users. The foot controls allow your hand to concentrate on wrestling your good catch into the boat. The Minn Kota Edge series motors are a great option for beginning bass or warm water species fishermen.
With the right amount of money in your pocket, you can purchase a motor with a thrust level starting from 45lbs up to 70lbs. However, I must add that it doesn’t boast of the best battery efficiency in the market today, but you still enjoy 7-8 hours of run time with a standard-size battery bank.
Its substantial shaft length makes up for the average battery life. The shaft length comes in different sizes; 36, 45, 50, and 72 inches, respectively. Not to worry, these cater for all boat sizes.
This motor is built rugged and can last years. Additionally, with fewer electronics the edge series motors rarely have breakdowns.
Click here to see the price on Amazon.com.
Conclusion
By now, you have more than enough information to allow you to install trolling motors on your own. You should be able to understand the basic wiring of the 24 volts trolling motors. While all these procedures seem pretty simple to replicate, it’s essential to have a look at the user manual provided by the manufacturers.
Also, you must place your safety and that of others before any technical task. Safety practices are always provided in the user manual, and it must be adhered to strictly. Now you can walk up to your boat, perform all sorts of operations on the 24 volts trolling motors without having to worry.